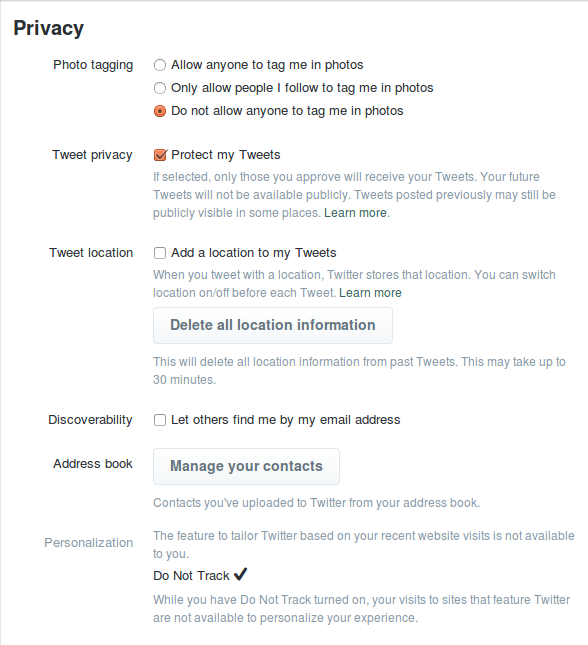
Stop your Gmail account being hacked
This wasn't a sophisticated attack against Google's systems, but rather a cleverly-crafted HTML email which pointed to a Gmail phishing page.
Victims would believe that they had been sent an attachment, click on the link, and be greeted by what appeared to be Gmail's login screen. Before you knew it, your Gmail username and password could be in the hands of unauthorised parties.
So, what steps should you take to reduce the chances of your Gmail account being hacked?
Set up Two step verification
Check if your Gmail messages are being forwarded without your permission
Where is your Gmail account being accessed from?
Choose a unique, hard-to-crack password
Secure your computer
Why are you using Gmail anyway?
. Set up Two step verification
The hackers who broke into high profile Gmail accounts grabbed usernames and passwords. So, an obvious thing to do would be to make Gmail require an extra piece of information before allowing anybody to access your account.
Google provides a facility called "two step verification" to Gmail users, which provides that extra layer of security. It requires you to be able to access your mobile phone when you sign into your email account - as they will be sending you a magic "verification" number via SMS.
The advantage of this approach - which is similar to that done by many online banks - is that even if cybercriminals manage to steal your username and password, they won't know what your magic number is because they don't have your phone.
Google has made two step verification easy to set up.
Once you're set up, the next time you try to log into Gmail you'll be asked for your magic number after entering your username and password. Your mobile phone should receive an SMS text message from Google containing your verification number.
Let's just hope the bad guys don't have access to your mobile phone too..
Here's a video from Google where they explain two step verification in greater detail:
By the way, note that two step verification doesn't mean that your Gmail can't ever be snooped on by remote hackers. They could, for instance, install spyware onto your computer which could monitor everything that appears on your screen. But it's certainly a good additional level of security for your Gmail account, and one which will make life much more difficult for any cybercriminal who might be targeting you.
2. Check if your Gmail messages are being forwarded without your permission
Gmail gives you the ability to forward your emails to another email address. There are situations where this might be handy, of course, but it can also be used by hackers to secretly read the messages you receive.
Go into your Gmail account settings, and select the "Forwarding and POP/IMAP" tab.
If your emails are being forwarded to another address, then you will see something like the following:
That's fine if you authorised for your emails to be forwarded to that email address, but a bad thing if you didn't.
If your messages are not being forwarded you will see a screen more like this:
Hackers want to break into your account not just to see what email you've received up until their break-in. Ideally, they would like to have ongoing access to your email, even if you change your password or enable two step verification. That's why it's so important to check that no-one has sneakily asked for all of your email to be forwarded to them.
In a similar vein, you had best ensure that no-one has unexpectedly been authorised to read and send email from your account.
Check that no-one unexpected is listed under the "Grant access to your account" option (found under "Accounts and Import" in Gmail's settings).
Even if you have granted permission for someone else to access your Gmail account, your security is now only as strong as that person's account security.
3. Where is your Gmail account being accessed from?
At the bottom of each webpage on Gmail, you'll see some small print which describes your last account activity. This is available to help you spy if someone has been accessing your account at unusual times of day (for instance, when you haven't been using your computer) or from a different location.
Clicking on the "Details" option will take you to a webpage describing the type of access and the IP address of the computer which logged your email account. Although some of this data may appear nerdy, it can be a helpful heads-up - especially if you spot a computer from another country has been accessing your email.
4. Choose a unique, hard-to-crack password
As we've explained before, you should never use the same username and password on multiple websites. It's like having a skeleton key which opens every door - if they grab your password in one place they can try it in many other places.
Also, you should ensure that your password is not a dictionary word, and is suitably complex that it's hard to break with a dictionary attack.
Here's a video which explains how to choose a strong password, which is easy to remember but still hard to crack:
5. Secure your computer
Secure PCIt should go without saying, but this list would be unfinished without it. You need to properly secure your computer with up-to-date anti-virus software, security patches and so forth. If you don't, you're risking hackers planting malicious code on your computer which could spy upon you and, of course, your email.
You always want to be certain that your computer is in a decent state of health before you log into a sensitive online account, such as your email or bank account. That's one of the reasons why I would always be very nervous about using a computer in a cybercafe or hotel lobby. You simply don't know what state the computer is in, and who might have been using it before.
6. Why are you using Gmail anyway?
Okay, I don't really mean that. But I do mean, why are you storing sensitive information in your Gmail account?
The news headlines claim that senior US political and military officials were being targeted by the hackers. Surely if they had confidential or sensitive data they shouldn't have that in their webmail account? Shouldn't that be on secure government and military systems instead?
Always think about the data you might be putting on your web email account - because if it's only protected by a username and password that may actually be less security than your regular work email system provides